So you finished the first part and you’re ready for more? Well lets continue then with the remainder of A Matter of Bridges.
The Soviets begin the turn without the benefit of the Designated Formation card from their Soviet Initial Invasion Planning special rule. The US forces will now enjoy a, potential, 2-1 advantage in activations.
Despite that, Turn 4 starts with the Soviets getting the first activation. This is not an optimal way for the turn to start for the Soviets.
Turn 4
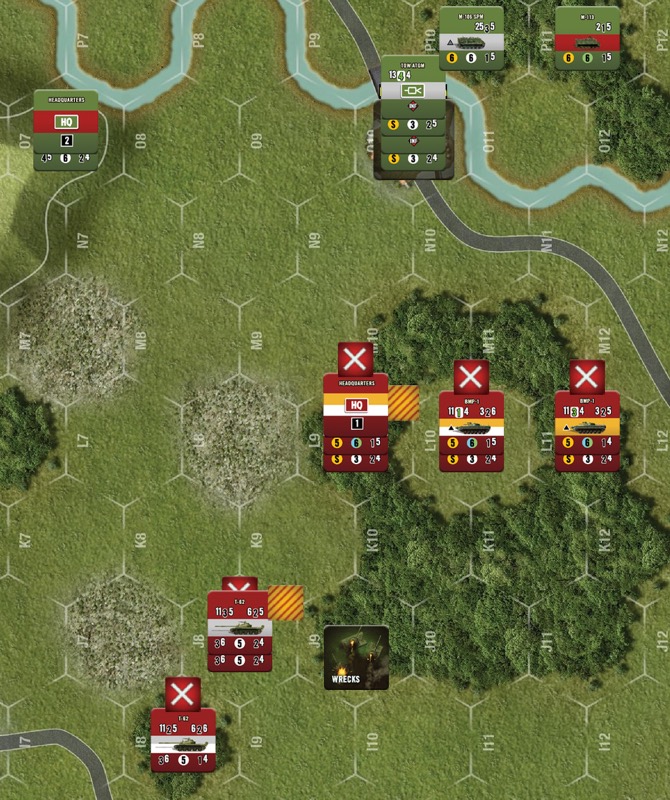
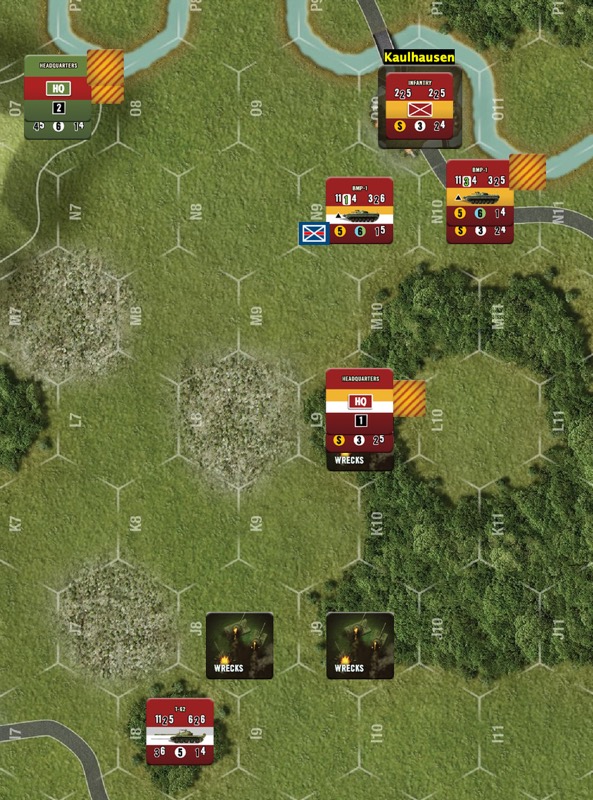
The disrupted BMP in J9 rallies and then moves in K10 and then L10. The reduced T62 in I8 takes a shot at the M1 on the hill in O7 but the M1 easily saves the damage. The BMP in L11 wants to fire a Sagger at the M113 in the Woods in P12 but that is within the three hex minimum range of the Sagger. Oops. Instead it uses its HE attack which misses entirely.
The T62s in I10 move to I9 to try to draw Op Fire from the M1 and do a Move and Fire. In instances like this it would handy to have the Solo Assistant to help determine the action of the M1. I decided to do it Old Skool and just roll a D6. The M1 holds off and the T62s move to J8 and the M1 bites and takes a shot. One T62 is Disrupted and the second takes a shot back at the M1. It gets a hit but the M1 rolls three 6s to make it all irrelevant.
With the M1 no longer able to fire the Soviet HQ stack moves into L9 so it has an LOS to a hex to be able to drop Smoke next turn. Its a bit of a risk but sometimes you have to do these things.
The Bravo 1/11th ACR card comes up next. None of the ATGM Infantry in Objective C have an LOS to any Soviets so they won’t have much to do this turn.
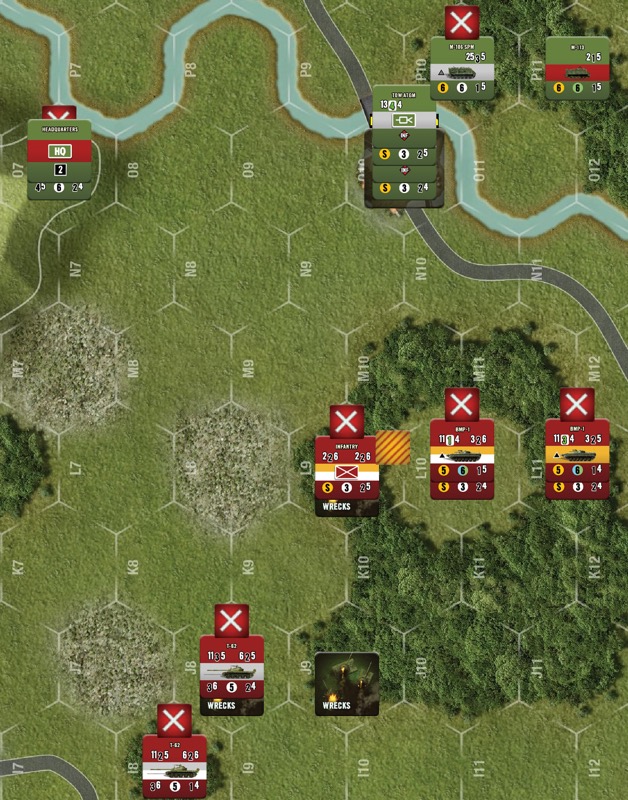
The US HQ spots for the SPM which attempts to drop some mortar rounds onto the Soviet HQ stack in L9. The BMP is the target for the attack which gets two hits. The BMP saves one and so is Disrupted. The M1 then fires at the same BMP, gets two hits of which the BMP only saves 1 and is reduced. The BMP’s passengers are fine but the HQ is also reduced.
The M113 decides to retreat one hex back into P11 to avoid any future HE rounds from the BMP.
The next activation card out is the Bravo 1/11th ACR card and things are not looking good for the Soviets.
The US Dragon or TOW infantry should probably start heading towards Objective D but that can probably wait until the Soviets invariably drop some smoke to assault Objective C.
Instead the HQ spots for the SPM which again attempts to drop mortar fire onto the BMP in L9. It is on target and hits twice. The BMP only manages one save and so it is wrecked. The passengers are reduced and Disrupted and the HQ is removed to the Suppressed Holding Box. Ouch!
With that hex dealt with, the M1 turns its sights to the T62s in J8 and fires at the Disrupted unit. The T62 makes no saves on two hits and so is wrecked. The US doesn’t have any other actions it wants to do so that is the end of their activation and the turn.
Turn 5
As if to compound the Soviet’s problems, turn 5 starts with the US forces activating making it three consecutive turns of American fire.
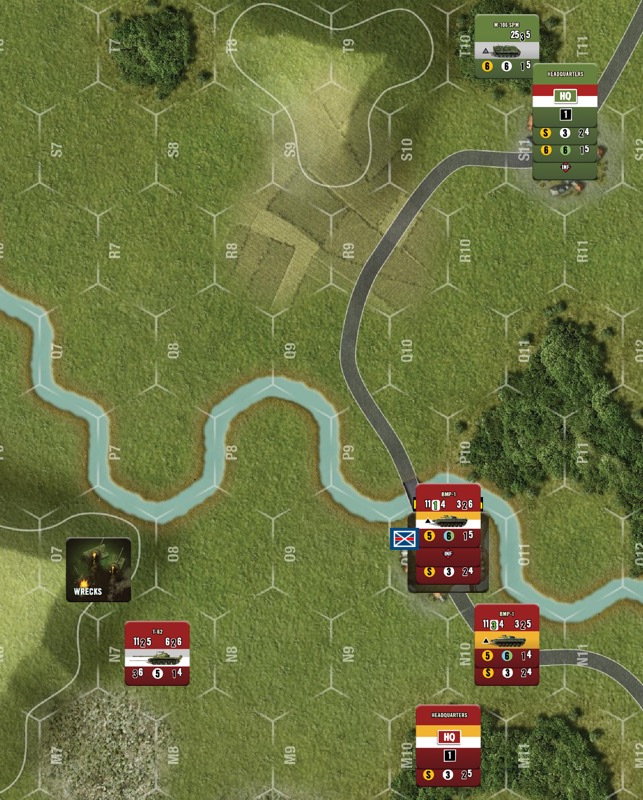
The M113 moves from P11 to P9 and then loads up the Dragon Infantry who move from O10. Next activation they will move to Asbach (Objective D) and set up. The HQ spots for the SPM who launches more mortar rounds at the beleaguered Soviet infantry in L9. It is on target and gets two hits but the Infantry save them both. The M1 in hex O7 takes a shot at the single T62 left in J8. It hits three times and it is no surprise that the T62 brews up.
The next card out is again the Bravo 1/11th ACR making it four straight activations for the Americans. Something for you potential Soviet players to take notice of.
The loaded M113 moves to Asbach (S11) but has used too many movement points to unload. The SPM is in a situation where any Soviet advance will be into its minimum range so it retrogrades down the road into hex T10. The US HQ has been spotting for it so LOS isn’t really an issue for it.
Thinking that the Soviet infantry are the largest remaining problem, the M1 decides to use its HE firepower against the poor Soviets in L9 but luckily for the Soviets it gets no hits.
The US ends their turn and the Soviets hope that the coin-toss comes up lucky and they get to activate this turn. Someone up there must like them (not Patton obviously) because their card comes up.
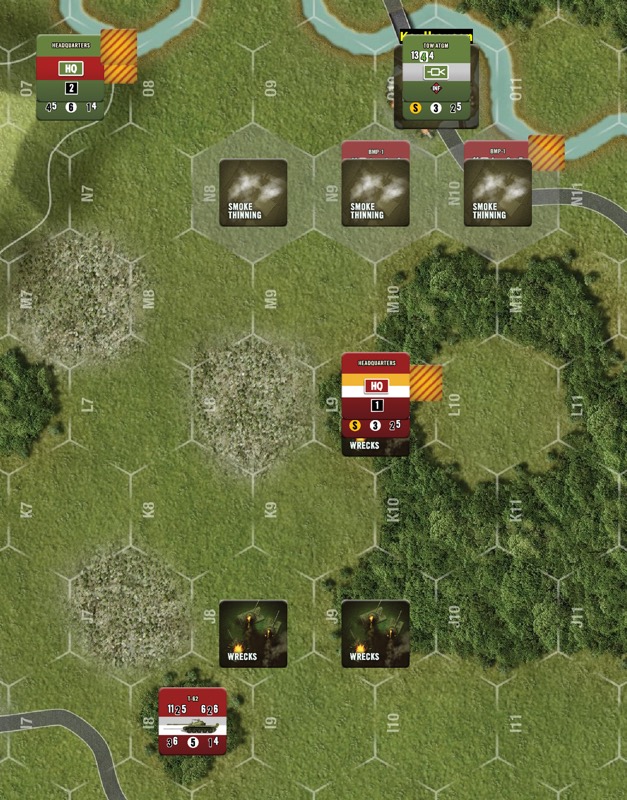
It is a quick trip to the reference cards to make sure that I get the steps in Formation Impulse Steps (7.0) done in the correct order. As it needs to see to drop Smoke and HE, the Soviet HQ is put back into dreaded hex L9. All of the Soviets are in Command but the shattered infantry in L9 fails to rally. Can’t blame them really.
The HQ can’t see O10 in order to drop HE on the infantry there so they elect to drop rounds on the US HQ and M1 in O7. It generates two hits but the M1 saves one and is just Disrupted. The HQ then calls in Smoke, which is accurate, and drifts it from hex N8 to N10.
Excited by all the Smoke, the BMPs start to advance. One moves from L10 to N9 and the second moves from L11 to N10. Since it is the end of the turn the US Infantry in O10 decide to Ops Fire at the BMP moving into N10. It gets two hits but the BMP saves one and is only Disrupted. Given how the turn has gone, this is a positive occurrence for the Soviets.
And finally, the T62 in hex I8 fires at the US M1 in O7. It generates a single hit which the M1 fails to save and so it is reduced. The HQ is unaffected by the fire.
Turn 6
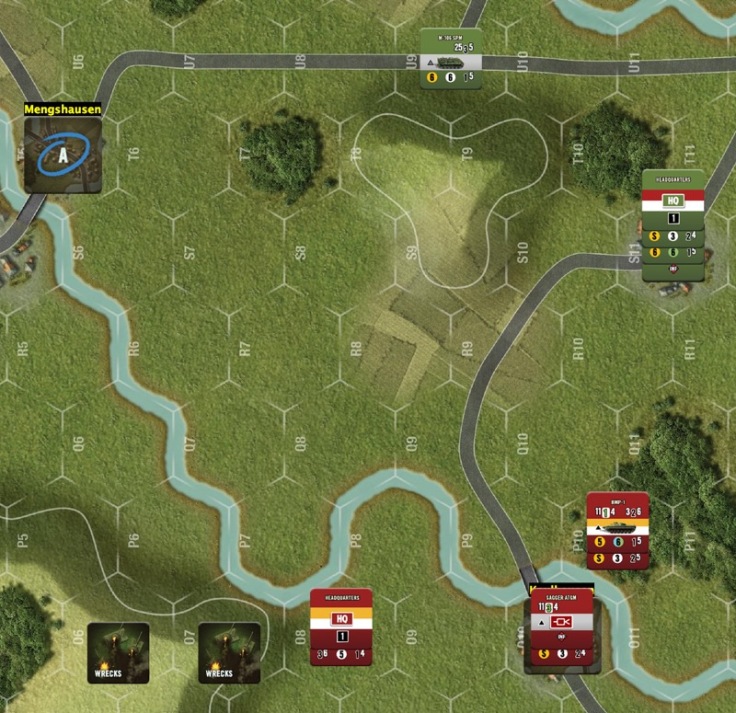
So after playing Turn 5 I reread the rules about Assaults and Transports and it appears that my Smoke placement has done the Soviets a great disservice. The Infantry can’t unload and then do an assault and the Smoke adds 1 MP to the terrain that it is in so they can’t move into the Smoke and assault. This leaves the Soviets in a situation where they won’t be able to Assault for several turns. So I repositioned the Smoke and will rerun the last two Soviet activations.
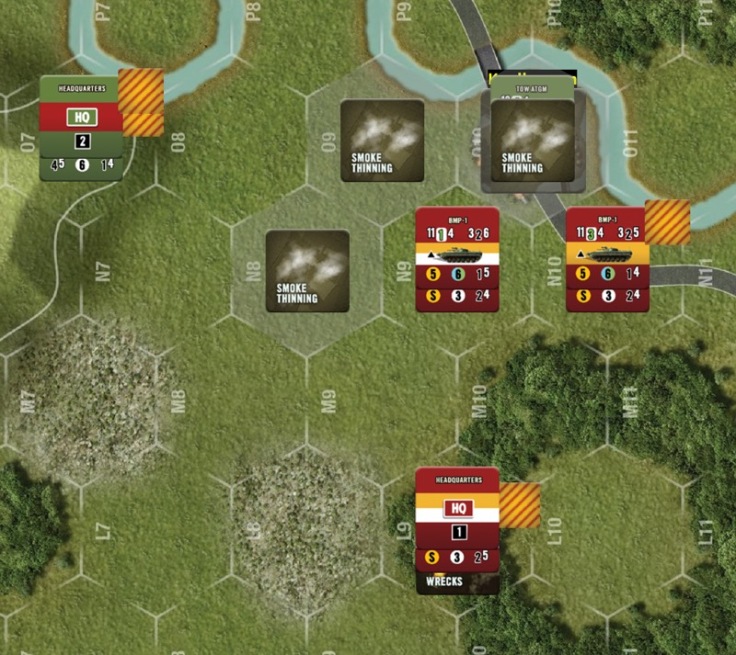
So the BMP moves into N10 as before, takes Op Fire and is disrupted. Then, the second BMP moves into N9 and unloads its Infantry into O10 for an Assault. The US Infantry rolls no hits and the Soviets gets a single hit. It eliminates the US Infantry and the Soviets take control of Objective C. So Turn 6 ends thusly instead.
The new Turn 6 then begins with the 247th Guards Motor Rifle Regiment. The Soviet Infantry in O10 is equipped with a Sagger support weapon. All of the Soviet units rally and the new turn begins with the BMP in N9 realising that the M1 in hex O7 is within the minimum range of the Sagger. Not this again. Lacking a target it moves into the town with the Infantry. Instead the BMP in N10 fires a Sagger at the M1. The Sagger hits once and the M1 doesn’t save. It is wrecked. The BMP passes an ammo check.
The T62 moves from I8 to N7. None of the other US units have range to the T62 or the appropriate attacks and so it moves unhindered. The SPM could use Indirect Fire to target the T62 but not Direct Fire. The HQ and the Infantry in L9 move into M10. The Soviet activation ends.
Turn 7

Turn 8
Turn 8 starts with an End of Operations card followed by the 2/247th GMRR activation card. The BMP in O6 fails to rally and I remember that the Soviet HQ now has a Command Range of 3 because it has been reduced. This changes my plans dramatically as I can now no longer keep units in Objective A and C in command at the same time. This means that to ensure victory the Soviets will have to try to take Objective D.
The HQ and the T62 move into hex O8. The T62 declares a Move and Fire and attempts to take out the M113 in hex S11.It misses. The BMP in O10 loads an Infantry unit and then steams across the river into hex . The only other way to advance from the objective is to move across the bridge and into P9 which the US units have a clear LOS to. They leave the Sagger support weapon behind as it will not be of any use.
Bravo gets the next activation. The Soviets kept their HQ and T62 out of Dragon range and there is no LOS to the BMP that crossed the river. The only action that they have is to fire the SPM. The HQ has LOS to the HQ as well as the disrupted stack in O6 so it decides to target the disrupted BMP and passengers. The barrage is on target and it gets two hits. As the rules currently stand the BMP gets a defensive bonus as the SPM is shooting “uphill” and then also gets concealment. None of this helps as it only saves a single hit. It is reduced as are the passengers.
Bravo gets to go again and since the only unit that has a target is the SPM we repeat the process. The barrage tears apart the BMP and scatters the passengers making them combat ineffective.
It isn’t really looking good for either side at the moment but the US does have a larger percentage of their troops still on the board.
Turn 9
After looking at the board there doesn’t appear to be anything the Soviets can do to take Objective D or A and nothing the US can do to retake Objective C and so I call the game at turn 9. The SPM might have been able to take out the T62 but unless the Soviets moved out or the US tried to attack there wasn’t going to be any sensible moves available to either side.
I draw two random Objective cards (I didn’t set it up the way that the scenario intended) and the Soviets manage to get five victory points. One shy of the six they needed for a win and not too shabby.
Post-game thoughts
Well I certainly learned a lot from that game. I wrapped my head around the rules for Smoke and also loading and unloading passengers. Those two worked to really mess the Soviets up and if I hadn’t rewound those actions the game would have been over because of it.
The SPM was very useful. It didn’t have a barrage scatter the entire game and while it probably wouldn’t be that effective against a T80 it did quite well against the T62s and BMPs.
I think that I could have done the first Soviet move onto the board better and I certainly screwed up with my placement of the Soviet HQ. It didn’t have any good HE or Smoke LOS on turn 2 and I took some losses because of it.
The scenario and/or the system seems to be forgiving of small tactical mistakes and so neither side really suffered from my novice leadership. I also liked how the game reflected the common perception that this type of combat would have been a Soviet force grinding itself down against a smaller but better equipped NATO force. I am not sure if it is realistic but that is certainly my expectation.
The game really does play well on Vassal. There aren’t a lot of charts to consult. This extends to the physical game as well. Once you figure out the few terrain and combat modifiers you can run the game with only the data on the counters. The Vassal mod is really well done and has a lot of useful automation built into it as well. I still do want to get in a game or three with the counters and cards. Nothing like fiddling with cards while you plan out your moves.
I am really quite liking this system and I am looking forward to setting up scenario 3 either on Vassal or ‘in the real world’ to play through it.

You must be logged in to post a comment.