So the time for theory is over and its time to put some, virtual, counters on the table and test out some of the thoughts and ideas I posted yesterday about A Matter of Bridges.
I am playing the game using the Vassal module primarily because my phone is old and has a rather bad camera and the light in my gaming area isn’t that great. Oh, and its now a home office. Thanks Covid.
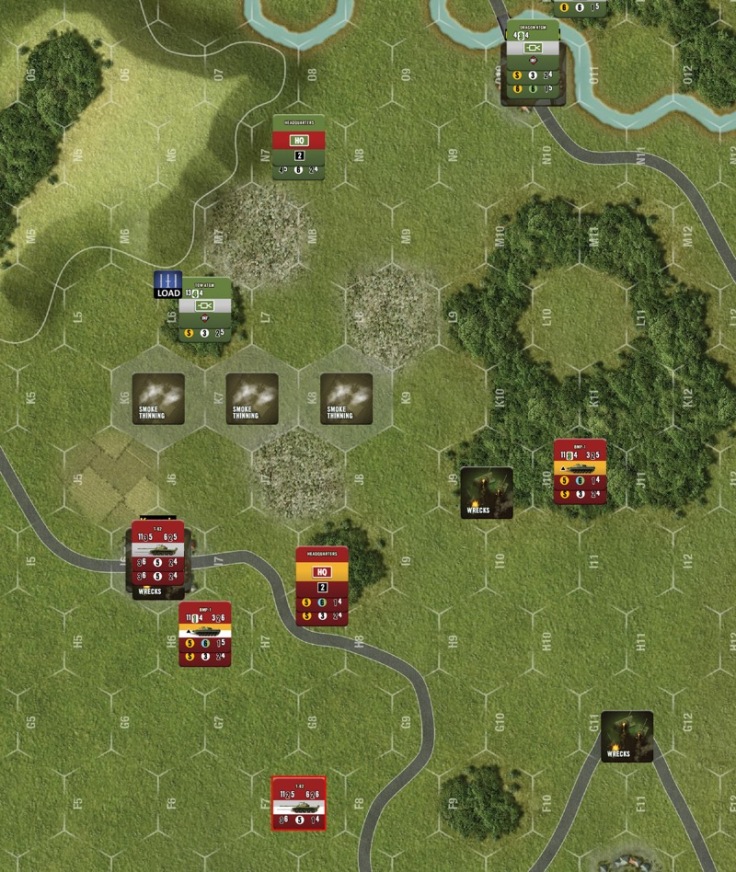
American setup
So I decided to occupy Objective B and hope to stave off the Soviet advance with some TOW fire. The US setup is influenced by the Command Range of the HQ.
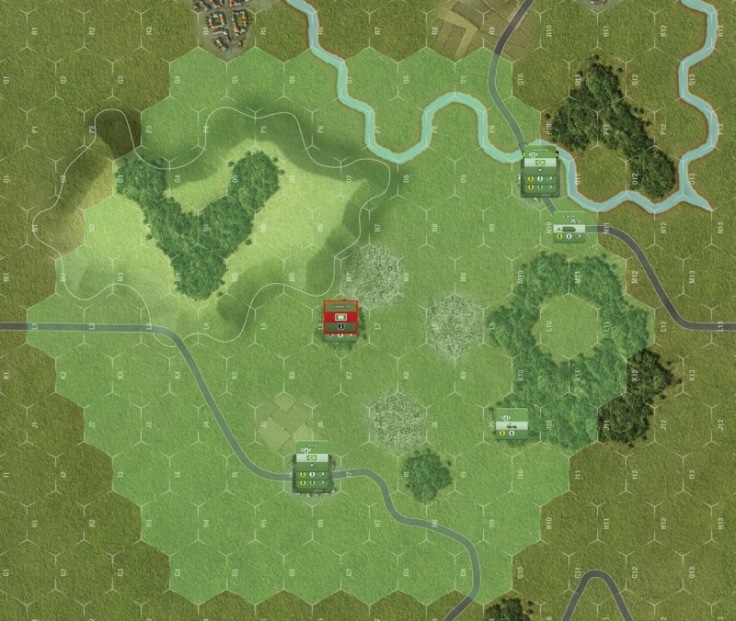
I attached the HQ to the M1 for maximum protection and put it in the woods in L6. I could have perhaps put it in the woods at J9 where the Jeep TOW is but that would, I think, have made it more of a prime target.
I would have liked to put the SPM in the woods in P10 but that was out of range of the HQ. There are many open areas for the M1, TOW and Jeep TOW to fire and hopefully the Soviets won’t get too many lucky hits.
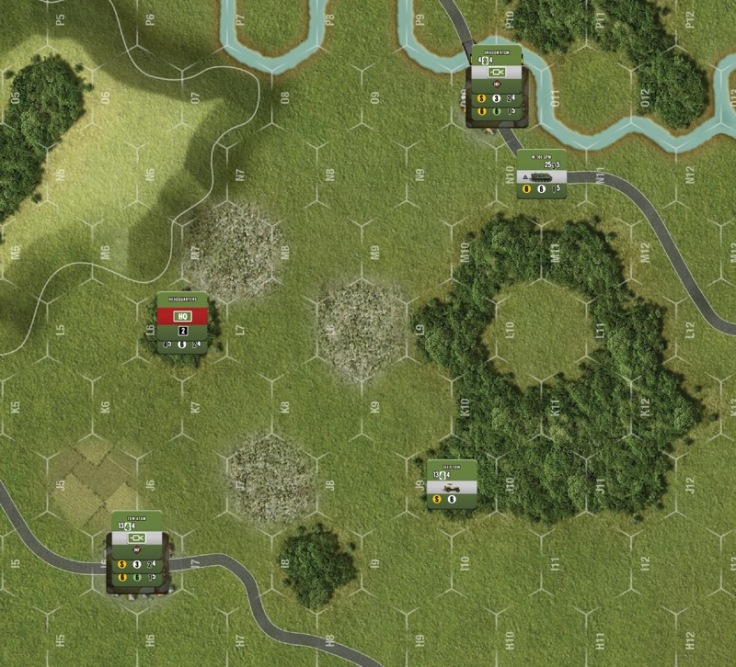
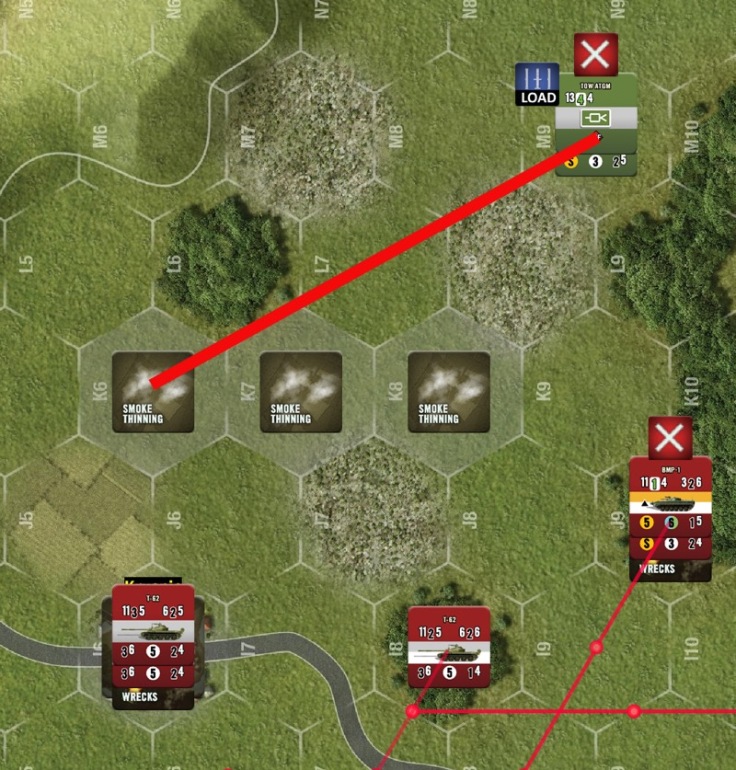
Soviet Pre-initiative activation
I think that I could have moved the Soviets onto the board in a better fashion. I sent out a BMP1 to try to trigger some reaction fire from the Americans. It worked. The TOW infantry in Objective B fired and Disrupted and reduced the BMP. The passengers were only Disrupted. Some T62s then moved on and then I started pushing the rest of the BMP1s up the road towards the small village. he Jeep TOW took aim at one and wrecked the BMP and eliminated the passengers.
Ouch!
Turn 1
The Soviets go first. I look to see if the HQ has LOS to any good sites to drop smoke but I can’t find any. A smarter player would have made sure they could see something. The T62s take turns firing at the M113 in Objective B. They manage to destroy it. The GIs will have to walk home now.
The BMP in E10 is one hex away from being able to unload their passengers and assault the Jeep TOW. So close. Instead I move a BMP into G11 where the M1 takes a speculative long-range shot which disrupts the vehicle and the infantry. The BMP at D10 fires a Sagger at the Jeep TOW. It gets a hit but the Jeep saves. The rest of the BMPs shimmy up into cover.
An End of Operations is next and then the first US activation card.
The HQ spots for the SPM which fires into G11. The BMP is unaffected. The TOW Infantry decide to take a shot at the disrupted BMP before it can launch an assault at the Jeep. They hit and destroy the BMP and its passengers. The M1 shoots at one on the T62s and Disrupts it.
An End of Operations card is drawn to end the turn.
Turn 2
The Soviets go first and promptly forget to use their Smoke or HE artillery attack. Rookie mistake. The T62 rallies but the BMP does not. The T62 moves forward and is hit with Opportunity Fire from the TOW Infantry. It is disrupted an reduced. The TOW fails an Ammo Check and is marked as Loading.
The BMP in the woods at F9 fires a Sagger at the Jeep Tow. Despite having 6 dice to roll it fails to make any saves and blows up. The BMP also fails its Ammo Check and is marked as Loading.
The stack of T62s in E9 declare a Move and Fire. They advance to G8 where the M1 takes an Opportunity Fire shot. It hits but the targeted T62 saves. The T62s take turns to fire at the TOW Infantry but with only one dice each they fail to do any damage.
The Soviet HQ moves into the woods in G11 making sure to keep the Disrupted T62 in command. The remaining BMPs start to move towards the woods.
An End of Operations is drawn and then the Soviet Designated Formation card. It has an immediate impact. Both the T62 and the BMP are rallied. The BMP that fired the Sagger also successfully reloads. That is a lot of successful 6 Morale checks.
The Soviets remember to call in their artillery and bring down an HE barrage into Objective B. The Infantry in the town is Disrupted. The Soviets also drop a Smoke barrage from K8 to K6 to stop the M1 from shooting.
With the US Infantry in I6 Disrupted, the T62s decide to Assault. Normally this would be Very Silly but since the GIs are disrupted they don’t get their bonus against tanks. The M1 is unable to see so the T62s move in. They only manage a single hit but the infantry gets nothing in response and so it is reduced and forced to retreat. It chooses to retreat into I5. A better move would have been to move into J5.
The newly rallied T62 fires a long-range HE shot at the retreating US infantry but does no damage. Two of the BMPs rush north and enter the woods. The reduced BMP moves into H6 but even though it declared a Move and Fire it doesn’t have LOS to the US infantry.
The US activation card is drawn next. After a quick check to see if there are any modifiers, the US infantry in I5 rolls to rally. It succeeds but isn’t able to reload the TOW this turn.
The Infantry decide to hoof it northwards but have to move around the Smoke in K6 or they would be stuck in it. The HQ & M1 move to N7 but no Move and Fire was declared so the M1 looks on at the lovely targets in J9 longingly.
Instead of firing the SPM moves from its location adjacent to the woods and crosses the river and moves into P10.
The next activation card is the second US card. A new activation means a chance to reload the TOW but the Infantry fail so the Reloading counter stays on. The Infantry are activated and move into the woods in L6. The M1 fires at the BMP in the woods in J9 but misses with all its dice. So much for the HQ bonus.
The HQ then spots for the SPM which drops rounds into the woods at J9 and takes out the BMP and its passengers. Who needs an M1 when you have an SPM around?
It started out so well for the Soviets.
Turn 3
It is the last turn in which the Soviets get the benefit of the Soviet Initial Invasion Planning special rule. The Americans get the first activation. They have no disrupted units so the Infantry with TOW roll to reload and fail. Not a good start.
Because of the Smoke none of the US units have an LOS to any Soviet units. Given that the Soviets also can’t Op Fire this might be a good chance to reposition safely. The US Infantry moves from the Woods in L6 to M9. The M1 and the HQ reverse uphill to move from N7 to O7. The SPM and the second infantry unit in O10 will stay put.
The Soviets go next with their Designated Formation card. This is good since it disappears this turn even if it doesn’t get drawn.
I am at a loss as to what to do with the T62s so I move the BMPs first. The reduced stack in H6 move into the Woods in J9. The BMP in J10 moves to K11 and then L11. The SPM looks to see if it has LOS for Op Fire but there are Woods clearly in the way. The HQ & BMP stack moves from the Woods in I8 to J10. The reduced T62 in F7 takes the place of the HQ in I8.
Finally, what to do with the stack of T62s in I6?
Post move edit: So my dilemma was based on not reading 14.2 correctly. (Thanks to Jim and Nicolas). The Smoke blocks LOS except to adjacent hexes so moving the T62s into that hex would stop them shooting out to any of the current US units and stop them firing at the T62s. At least until the Smoke disappeared.
In the end I move them to I11 to keep them safe and within Command Range.
The Americans then get their second activation. The TOW Infantry finally reload their launchers but the Smoke is still up so they currently don’t have anything to shoot.
To make room for the TOW Infantry, the M113 in Objective D moves into the Woods in hex O12. All of the Soviet units are Ops Complete so it can vroom to its heart’s content. This lets the TOW Infantry in M9 move into Objective C.
The M1 realises that it has LOS to the BMP in J9 (and probably could have Op Fired as well) so it takes a shot. It gets a single hit which the BMP saves.
Since the HQ can also see that hex it spots for the SPM to do some indirect fire. The fire is on target but only gets a single hit which, this time, the BMP fails to save.
The American forces are done but sadly the next two cards are both End Operations and so the turn ends. Since the Soviet formation did active this turn it can’t keep an End Operations card for the next turn.
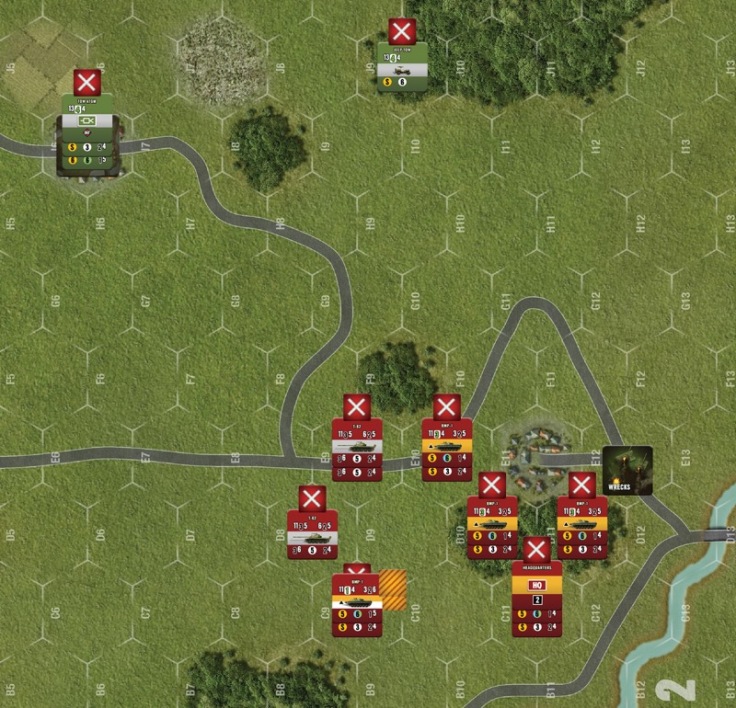
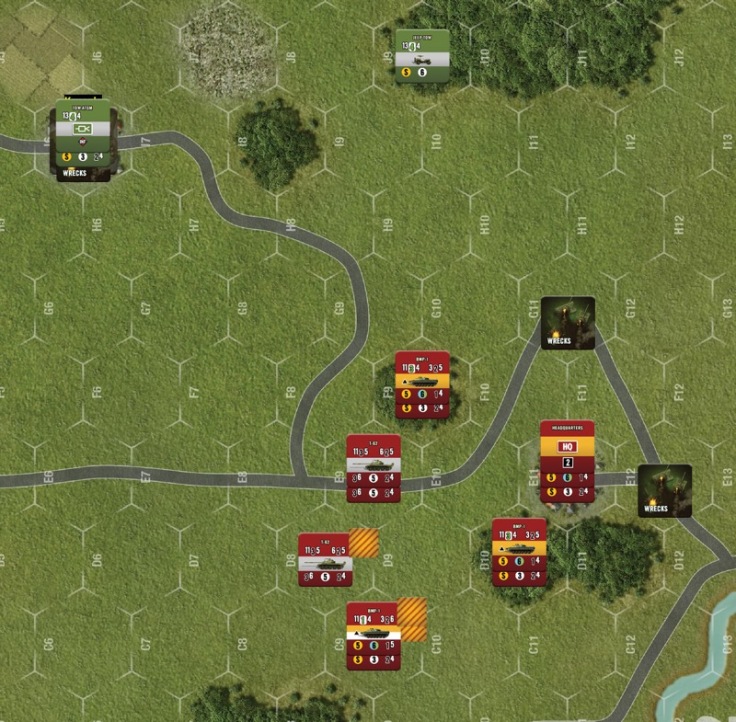
And this is how it stands at the end of turn 3

Since I appear to be going on at length and the game is taking a bit longer than I thought I will wrap this installment up and continue the game in another post.
You can read the rest of the report in this second part.

You must be logged in to post a comment.